Instagram : Adding Effects and Filters on photos and videos
How do I apply filters to my photo or video on Instagram?
Once you’ve taken or uploaded a photo or video, you can edit it by applying filters:
- Tap Next, then tap the filter you’d like to apply.
- Tap the filter again if you want to adjust filter strength left or right using the slider. Tap Done to save your change.
- Tap Next to add a caption and location.
- Tap Share.
Note: You can rearrange the order of your filters by pressing and holding a filter at the bottom of the screen, then dragging it to the desired position.
How do I apply effects to my Instagram photo?
You can edit photos you take or upload from your phone’s library. Once you’ve taken or uploaded a photo, tap Next then tap Edit at the bottom of the screen. Learn more about the effects you can create:
- Tap Adjust to change the photo’s vertical or horizontal perspective.
- Tap Brightness to make your photo brighter or darker.
- Tap Contrast to make the bright areas of your photo brighter and the dark areas darker.
- Tap Structure to bring out the detail and texture in your photo.
- Tap Warmth to shift the colors of your photo toward warmer orange tones or cooler blue tones.
- Tap Saturation to increase or decrease the color intensity of the image (example: adjust up to make the red redder).
- Tap Color to add a color (yellow, orange, red, pink, purple, blue, cyan or green) to either the shadows or highlights of your photo. Tap the color you want to use twice to adjust the strength of the color.
- Tap Fade to give your photo an aged look.
- Tap Highlights to adjust the focus on the bright areas of the image.
- Tap Shadows to adjust focus on the dark areas of the image.
- Tap Vignette to darken the edges of the photo. Adding a vignette can direct the attention away from the edges towards the center of the photo.
- Tap Sharpen to add crispness to your photo and make the photo appear clearer.
- Tap Tilt Shift to give the appearance of a shallow depth of field, or placing the focus on a subject in the background while blurring out the foreground and vice versa.
- Tap at the top to balance exposure and increase brightness.
In preview mode, a gray dot will appear below each of the effects you’ve applied to your photo. For example, a gray dot below Brightness means you’ve adjusted the brightness of your photo.
I just applied an effect to my Instagram photo. How do I compare it to the original version?
Before posting a photo, you can tap on it and hold to see what the original version looks like.
How do I crop my photo on Instagram?
After you’ve uploaded or taken a new photo, you can crop it. To crop a photo:
Tap Edit > Adjust .
Touch the screen and pinch to zoom in. Then move the photo and adjust how it fits within the frame. Use the grid to help you frame the photo.
Tap Cancel to cancel or Done to save your change.
How do I straighten a photo on Instagram?
When you take a photo using the Instagram in-app camera or upload a photo from your phone’s library, you can straighten it with the Adjust tool. Once you upload a photo:
Take or upload a photo, then tap Edit at the bottom of the screen.
Tap Adjust, then swipe the slider left or right to straighten the photo. Use the grid to help you frame the photo.
Tap Cancel to cancel or tap Done to save your change.
How do I rotate a photo on Instagram?
You can rotate a photo after taking it or uploading it from your phone’s library. To rotate your photo:
Tap Edit at the bottom of the screen, then tap Adjust.
Tap (iPhone) or (Android) in the top right to rotate your photo.
Tap Cancel to cancel or Done to save your change.
What are some tips for uploading, recording and editing my Instagram story?
When you share a photo or video to your story, you can use creative tools to help capture and edit them.
Taking photos and videos
- Tap to adjust the flash for your photos or videos. To take better photos and videos in the dark, keep tapping until you see (iPhone only).
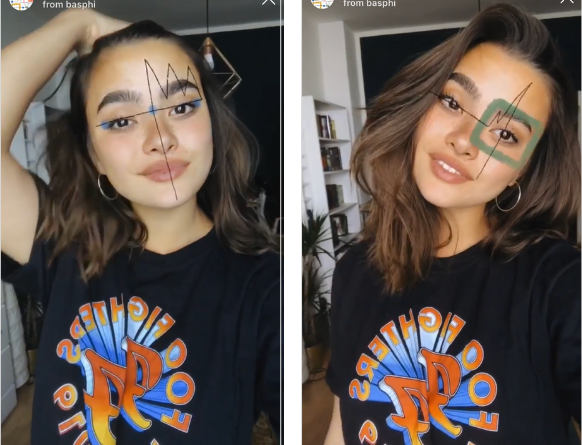
- To take a photo or video with a camera effect, swipe left at the bottom of the screen and select an effect. You can also swipe all the way to the left and tap to see more effects from Instagram and from independent creators. When using the front or back-facing camera, the effect you choose will automatically appear on the closest person’s face. Keep in mind that effects aren’t supported on some older devices.
- To zoom while recording a video, tap and hold with one finger to start recording, then slide up or down using that same finger.
- Tap Boomerang at the bottom of the screen, then tap the circle at the bottom to take a burst of photos that loops forward and backward.
- Tap Superzoom to take a video that automatically zooms in on an object and plays a dramatic sound. Tap anywhere on the screen to select an area or object to zoom in on, then tap the circle at the bottom to start recording.
- To take a video without having to tap and hold, swipe left at the bottom of the screen and tap Hands-Free. Tap once to start recording a video, or tap and hold to see a timer that counts down before recording.
- Tap Music at the bottom of the screen, then search for a song and tap the one you want. You can edit which part of the song you want to play in your story. Above , you can select different effects that respond to the beat of the music. Swipe left to see all the effects and select the one you’d like to make a video with.
- Tap Create at the bottom of the screen to personalize a story without needing a photo or video to start from. Swipe left at the bottom of the screen to choose to type something, add a GIF or ask a question, among other things.
- Tap Live at the bottom of the screen and then tap to share a live video and connect with your followers in real time.
- You can switch between front and rear-facing cameras while recording a video. Tap and hold to start recording, then tap .
Editing photos and videos
To add a filter to your photo or video, swipe left or right after taking it.
You can also tap the following creative tools at the top of the screen:
Tap to add text. From there, you can:
- Add emoji.
- If you use the Classic text style, you can adjust text size up or down by tapping and using the slider.
- Center text or align left or right by tapping (only available for some text styles).
- Rotate and resize the text by using two fingers to pinch and zoom.
- Choose a text color by tapping the colors at the bottom of the screen. Swipe to see more colors, or tap and hold a circle to choose a custom color.
- Change the text style by tapping the button at the top of the screen.
- Add a color background to text by tapping at the top of the screen and selecting a color.
- Pin text to a fixed spot in your video. After taking a video, add text, then tap it and hold. Use the slider bar at the bottom of the screen to scroll through the video to find where you want to pin the text. Move the text and tap Pin.
- Tap again to add another section of text.
- Type @ then enter someone’s username to mention them.
- Enter a hashtag (example: #flower). People can tap it to view the page for that hashtag.
Tap to draw on your photo or video. From there, you can:
- Choose from different brushes and drawing tools from the options at the top of the screen.
- Adjust the line thickness by using the slider on the left.
- Choose a color to draw with by tapping the colors at the bottom of the screen. Swipe left to see more colors, or tap and hold a circle for more color options. You can also tap and drag and drop it to select a color from your photo or video.
Using stickers on Instagram
If you’re not seeing certain stickers on Instagram, make sure your app is updated to the latest version by visiting the App Store or Google Play Store. Keep in mind that not all stickers are available to everyone.
When you share a photo or video to your story, you can add stickers to express yourself in fun and unique ways.
From your story, tap to add stickers. From there, you can:
- Add a chat sticker to start a conversation in a new Direct thread with a group of friends. You can edit the text of the sticker to name the chat, and your friends can tap the sticker in your story to request to join the chat. You can see which friends requested to join and choose who you want to start the chat with. You can add or remove people from the chat and end the conversation at any time.
- Add a donation sticker to allow people to donate to a nonprofit that you care about. After you select the donation sticker, you can select the nonprofit you want to raise money for and customize the name of your fundraiser. When people see your donation sticker in your story, they can tap Donate to donate to your selected nonprofit. Swipe up on your story to see the total amount raised and donations by username.
- Add a quiz sticker to write your own multiple-choice question and customize the answers. People can respond by tapping an option you’ve provided. Once published, your followers can vote and learn whether they got it right. When you view your story and swipe up, you can see how many votes each option received and how each person voted.
- Add a countdown sticker to count down to any moment. After you select the countdown sticker, you can tap to customize the name, date and time, and color (by tapping the color picker). When followers see your countdown sticker in your story, they can tap the arrow in the corner of the sticker to remind them or share your countdown to their story. When the countdown ends, you and everyone who turned on reminders for your countdown will receive a notification.
- Add a questions sticker so people can ask you a question or send you a song. First tap the questions sticker and then select to let people ask you a question, or tap to let people send you a song. People can tap the sticker in your story, then type a question to ask you or send you a song. When you view your own story and swipe up, you can see who responded. Tap a response from someone to share it. Keep in mind that when you share someone’s question or song, their photo and username won’t be shown.
- Add a music sticker and search for a song. If lyrics are available for the song you select, you can choose different fonts and designs for them, and you can edit which part of the song you want to play. When someone watches your story, they can tap the lyrics to learn more about the artist or listen to more of the song.
- Add a poll sticker or emoji slider sticker to write your own question and customize the answers. People can respond by tapping an option you’ve provided or sliding the emoji you’ve chosen. Once published, your followers can vote and see realtime results. When you view your story and swipe up, you can see how many votes each option received and how each person voted.
- Add a location sticker by searching for or selecting nearby options. When people see your story, they’ll be able to tap the sticker and view the page for that location.
- Add a hashtag sticker. When people see your story, they’ll be able to tap the sticker and view the page for the hashtag you enter.
- Add a current time or weather sticker. These stickers are based on information from your device and your current location.
- Add a selfie sticker by tapping and taking a photo. You can tap the sticker for more options.
Managing stickers
- Pin stickers to a fixed spot in your video. After taking a video, add a sticker, then tap it and hold. Use the slider bar at the bottom of the screen to scroll through the video to find where you want to pin the sticker. Move the sticker and tap Pin.
- Rotate and resize a sticker by using two fingers to pinch and zoom.
- Delete a sticker by dragging and dropping it on at the bottom of the screen